
by Dan DiNicolo
http://www.2000trainers.com
Based on the popularity of
Windows, many people today ignore the power of the command line. While the
graphical interface makes handling tasks more user friendly, the command
line really allows you a great deal of flexibility. With a simple (and free)
additional tool called XXCOPY, you can easily back up files and folders,
clone your hard drive, and so forth. For system administrators, XXCOPY
provides maximum flexibility for the purpose of copying files between
systems, “replicating” data, and more.
DOS and Windows have long included the XCOPY utility as a simple but useful tool for copying data, making backups, and so forth. Pixelab greatly extends the power of XCOPY and takes things to a whole new level with the freeware utility XXCOPY, which doesn’t stop at just copying multiple files — it provides more than 200 advanced features for even the most advanced user.
DOS and Windows have long
included the XCOPY utility as a simple but useful tool to copy data, make
backups, and so forth. For the most part, XCOPY will meet your basic file
copying needs. However, a great freeware utility from a company called
Pixelab greatly extends the power of XCOPY and takes things to a whole new
level. XXCOPY doesn’t stop at just copying multiple files — it provides more
than 200 advanced features for even the most seasoned user. For those in a
corporate environment, XXCOPY Pro takes the single PC features of the
freeware version and extends them to include networked systems. Whether
you’re looking for an easy way to backup files, clone a hard drive, or
synchronize files between servers, XXCOPY has something to offer.
XXCOPY is a command-line
program that works on nearly every Windows platform, including Windows XP, 2000, NT, ME, 98, and 95. A
16-bit version is also included for use with Windows 3.1 that supports 8.3
filenames only. The program installation is a breeze — just run install.bat.
The program will be installed to your WindowsSystems32 (or WINNTSystem32)
directory by default — this will make it available from anywhere in the
command line environment.
At the most basic level,
XXCOPY is nothing more than a tool to copy files from one location to
another using the command line. The syntax of the command is also very
simple. Almost every command that you issue will include these three basic
elements:
xxcopy
All you’re telling XXCOPY
is that you want files moved from one location to another. For example, if I
wanted to copy a folder called ‘worddocs’ from my C drive to a
not-yet-created new folder called ‘backupdocs’ on my D drive, the command to
issue would be:
xxcopy c:worddocs d:backupdocs
Going a step further,
XXCOPY has over 200 possible switches that allow a high degree of
customization. For example, you could specify that you only want to copy
files that were created within the last three days, or those that are larger,
smaller, or within a certain size range. My personal favorite is the switch
that will search for all files specified, and copy them into a single
flattened directory.
The table below outlines
some of the more common switches. To keep things clear, you should get in
the habit of specifying the switch after the destination, but this isn’t
required. You should also note that switches can be combined to make the
tool even more powerful.
|
Switch |
Purpose |
|
/H |
Also copies system or |
|
/Ho |
Only copies system or |
|
/R |
Allows read-only files |
|
/BN |
Back up only new files |
|
/DA: |
When is |
|
/DB# |
When ‘n’ is specified, |
|
/SZ:- |
When ‘n’ is specified, this copies files whose size (in bytes) in greater than ‘n’ |
|
/SZ:- |
When ‘n’ is specified, |
|
/S |
Copies directories and |
|
/E |
Copies directories and |
|
/SX |
Flattens |
|
/PB |
Shows a progress bar |
|
/X |
Can be used to exclude |
|
/K |
Keeps file attributes |
|
/U |
Updates files already |
|
/SG |
Gathers files from |
|
/CLONE |
Duplicates an entire |
|
/BU |
Standard backup |
|
/BI |
Incremental backup |
Since going through every
single switch here would be impossible, it’s worth noting that running
XXCOPY /? provides a listing of the most common switches and their purpose.
For a complete listing of all switches, use /HELP.
To get a feel for the power
of this tool, let’s take a look at a few examples. Imagine that you were
interested in backing up your entire ‘my documents’ folder (including
subdirectories) from your C drive to a folder called ‘mydocsbackup’ your D
drive. The command to issue would be:
xxcopy "c:my documents" d:mydocsbackup /S/H
Notice the quotes around
the source path above. You must add quotes in cases where a directory (or
file) name contains a space. In this case, the contents of My Documents,
including hidden files and subdirectories, will be copied to a folder on the
D drive called ‘mydocsbackup’.
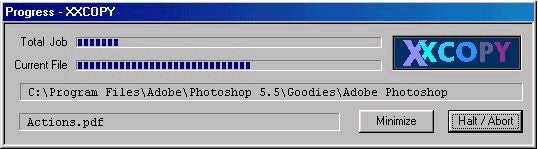
Let’s go a step further.
Suppose you wanted to find all of the PDF documents on your system and back
them up to a single directory on a different drive or partition. This can
easily be accomplished using the /SX switch, along with a wildcard. I’m also
including the /PB switch — this will add a progress bar to let us know how
the copy operation is coming along.
xxcopy c:*.pdf d:pdfs /SX/PB
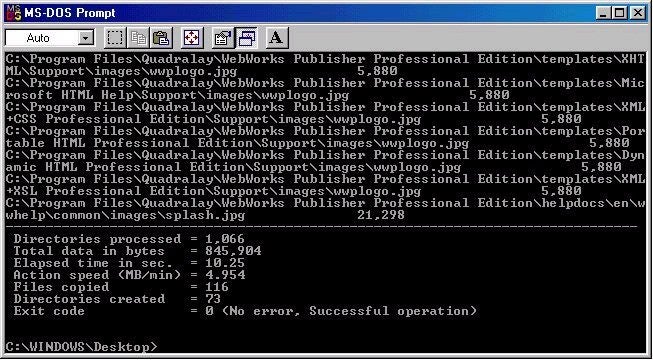
This command gives us a
slightly different result. While it copies all of the .pdf files found on
drive C into the D:pdfs directory, it also renames the files to tell us
where they came from. For example, if a file named work.pdf was originally
in your C:documentstest folder, it would now be named:
work'documents'test.pdf
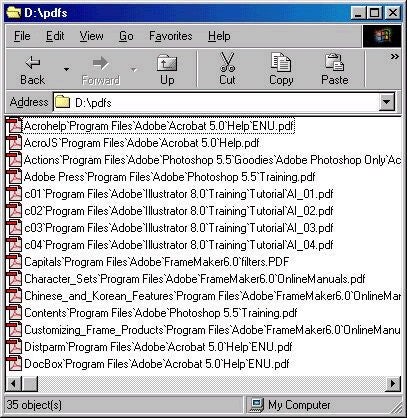
Notice that the former path
is specified in the new filename. Since all .doc files on C were copied to
the same single directory, it’s possible that two files with the same name
might exist — this feature helps to circumvent possible problems with
duplicate file names. If you want to avoid the possibility of files being renamed, you could
always just use the /S switch, in which case the folder structure would also
be copied along with the .doc files.
XXCOPY also allows you to
easily copy files that were added or changed within a certain date range.
For example, if you wanted to copy all of the jpeg files on your C drive
that were created or changed between March 18 and March 21, 2002, issue the
following:
xxcopy c:*.jpg d:jpegs /DA:2002-03-18 /DB:2002-03-21 /S
Incremental Backups
But what if you just want
to do simple backups regularly? That’s easy, too. For example, let’s say that
you wanted to back up all data in your C:My Documents to a folder called
‘backup’ on drive D. The first time you do this, you should issue the
command:
xxcopy "c:my documents" d:backup /BU /X*.tmp
This command will back up the entire contents of your ‘My Documents’ folder to the ‘backup’ folder on
your D drive. Notice the /X switch — this tells XXCOPY to exclude any files
that end in .tmp.
XXCOPY really gets useful
when you want to do additional backups. Since the majority of your data was
backed up the first time, there is no need to re-copy things that haven’t
changed. This is where an incremental backup comes in. If you were to issue
the same command, but use the /BI switch instead of /BU, only files that
were different than those already in the destination folder would be copied
— a quick and easy way to back up your new or changed files.
XXCOPY for Disk Cloning
Probably the most popular
use of XXCOPY is as an inexpensive and simple disk-cloning tool. Using
XXCOPY, you can easily clone your primary hard drive onto a second drive.
Reasons for doing this include the purchase of a new drive, or simply as an
emergency spare should your primary drive fail. One note before going any
further — the cloned drive can only be made bootable for Windows 95/98/ME.
XXCOPY cannot recreate a bootable disk for Windows NT/2000/XP systems.
There are a few steps
involved when creating a cloned disk. To begin, you’ll need to attach the
new hard disk to the system. I’ll assume that your current disk is one large
partition, drive C. You’ll also need to create a partition on the new disk
and format it prior to initiating the cloning process.
Once the new disk has been
formatted (I’ll assume it’s drive D), reboot into Windows and issue the
following command:
xxcopy c: d: /CLONE
This switch will copy the
contents of the C drive over to the new D drive. Note that some files may
not be copied due to file access contention problems. To make things simple,
your best option is to close all programs that may be running prior to
issuing the command. If some files have been missed, simply issue the
command again, and it will copy missing files as if an incremental backup
were being done. Don’t worry if you notice that the file WIN386.SWP hasn’t
been copied — this is the virtual memory swap file, and it doesn’t need to
be copied. The cloning process will transfer anywhere between 2-15 GB of
data per hour, depending on the speed of your hard drives.
Once the clone operation
has completed, a few steps remain. The first is removing the old drive and
replacing it with the new one. This may involve changing the drive
from a slave to a master, so you may need to change the jumper pins on the
back of the drive. After this is completed, boot the machine using your
system floppy disk. You’ll need to go into FDISK and mark the new drive as
Active in order for it to be bootable. The last step is writing the Master
Boot Record (MBR) to the disk, since XXCOPY will not copy this from the old
disk. From the command line, simply issue the command:
FDISK /MBR
After this is done,
simply remove the floppy and boot to Windows — welcome to your newly cloned
system!
XXCOPY can be downloaded from
http://www.xxcopy.com/

ServerWatch is a top resource on servers. Explore the latest news, reviews and guides for server administrators now.
Property of TechnologyAdvice. © 2025 TechnologyAdvice. All Rights Reserved
Advertiser Disclosure: Some of the products that appear on this site are from companies from which TechnologyAdvice receives compensation. This compensation may impact how and where products appear on this site including, for example, the order in which they appear. TechnologyAdvice does not include all companies or all types of products available in the marketplace.